Showing posts with label Setup. Show all posts

SMB Protection Requires Careful Setup

Server Message Blocks, or SMBs, are the life blood of Windows Networking. On high security networks, you can create secure channels between the server and client, to ensure security of SMBs. You can provide authentication (digital signing) and / or encryption (digital encryption) of SMBs, similar in nature to WPA, as used in WiFi security.

However, just as WiFi connectivity being prevented by improper setup of WPA, necessary use of Windows Networking can be prevented by by improper setup of SMB protection. Both SMB Encryption and Signing must be setup consistently on your network. If any of your clients don't support either protection, it's best that you don't require it on your servers.

When you try to connect a Windows client computer to a server, you may see

The account is not authorized to log in from this station.


If a server requires SMB encryption or signing, all workstations must provide it, if they are going to connect to that server. SMB Signing has been supported since Windows 98 and NT V4.0. Non-Windows operating systems, such as Apple and Linux / Unix, may or may not support SMB Signing. Be consistent in your LAN, however you choose to set it up.

For computers in a workgroup, you configure SMB Encryption and Signing using the Local Security Policy editor. For computers in a domain, the Local Security Policy editor is available, but settings may be overridden by Group Policy.

You will have settings for both the server (incoming SMBs) and the workstation (outgoing SMBs), and settings for encryption (to prevent snooping) and signing (to prevent spoofing). You'll find settings under Local Policies - Security Options. Domain member, Microsoft network client, and Microsoft network server Policy Categories all contain relevant settings.

Note both server and workstation services, and thus these settings, apply to most Windows computers. And note the difference between Enabling SMB Signing (where both computers that enable SMB Signing, and those that don't, will be able to connect to each other) and Requiring SMB Signing (where only computers that enable SMB Signing will be able to connect to each other).

For more detail, see:

>> Top

Windows XP And Vista On The LAN Together

File and Printer Sharing in Windows Vista is not extremely different from File and Printer Sharing in Windows XP. There are new features, and wizard procedures, that work on top of Windows XP features and procedures. If you have a working network, with one or more computers that use Windows Networking, you probably know enough to get started.

There will be challenges though. One predictable challenge is the availability (or lack of availability) of drivers for devices that are operating system sensitive, like network adapters. This has inspired various attitudes, even rants, among the user community.

Computers running Windows Vista use the same layered network as previous versions of Windows, so start by reviewing the principles of layered network design and installation, and of layered network problem solving. And review various issues that affected Windows Networking on computers running Windows XP.

>> Top

System Updates Issues
With Windows Vista, as with Windows XP, Microsoft will issue periodic (and monthly) updates. Most updates are for security issues, and others for operability and / or stability. All updates are necessary, if recommended for your edition of Vista, and some may have a direct effect on your problem.

As an interim measure, possibly before an actual Service Pack, Microsoft has started issuing compatibility, performance, and reliability fixes, covering a variety of issues with Vista.

>> Top

Connectivity Issues
By default, computers running Vista will set the Broadcast flag, in the DHCP Discover packets, On. If your DHCP server (NAT router, or non-Microsoft dedicated server) doesn't support DHCP Broadcast, you'll have various problems - your computer may never get an IP address, or your IP connectivity may come and go unpredictably. To make your Vista computer compatible with Windows XP, (KB928233): turn the DHCP Broadcast flag Off. Besides the DHCP Broadcast difference, be aware of an interesting (KB931550): timing difference between the Windows Vista and XP DHCP clients.

One of the most interesting features in Vista (my opinion anyway) is the ability to dynamically determine Receive Window size for each individual Internet connection. Users of high speed broadband connections will be especially interested in this. Unfortunately, it appears that RWin AutoTuning may be a bit problematic. This setting has been observed to affect both LAN and WAN connectivity, and can cause instability, or lack of connectivity.

On laptop computers, and other computers with multiple network adapters, you'll see an inaccurate / inconsistent network status indicator, when the computer is first started.

Like every newer version of Windows, Windows Vista will use more resources on the host computer, and on any peripherally connected computers and routers. If your peripheral network equipment like routers are becoming aged, you'll be advised to upgrade or replace whatever you can.

The IPX/SPX Protocol is not provided in Windows Vista, though Novell does now provide a Netware client for Vista. NetBEUI, on the other hand, is now a part of history.

>> Top

Visibility Issues
One of the new features of Windows Vista is the Network Map, which runs at the Link Layer of the OSI Network Model, and offers functions similar to The Dude. The Network Map uses a discovery protocol called Link-Layer Topology Discovery (LLTD), which is not a normal part of Windows XP.

To be able to see a Windows XP server from a Vista client, using the Vista Network Map, you need to install (KB922120): the LLTD Responder on any Windows XP computers. The LLTD Responder isn't available for Windows 2000, so you won't be able to see a Windows 2000 server from a Vista client, using the Vista Network Map.

Even if you can't see a Windows XP or 2000 computer in the Network Map, though, you'll still be able to see it in Network Neighborhood / My Network Places, aka the Network window (Start - Network) in Windows Vista. And even if you can see a computer in the Network Map, you may still have to work on name resolution, or on sharing permissions, if you are going to actually access its resources.

The simplest visibility will be enjoyed with all computers in the same workgroup. By default, Windows Vista uses "Workgroup", while Windows XP uses "MSHome". If you leave workgroup names at default, the other computers will be visible in the Network (My Network Places aka Network Neighbourhood) wizard, but they won't be seen immediately, when you open the wizard. You may have to look under Entire Network - Microsoft Windows Network, for the different workgroups used by each set of computers. And with having multiple browse domains (workgroups), your browser infrastructure will be slightly more complex.

>> Top

Using A Windows Vista Client
Under Windows Vista, the personal storage (personal profile and other files and folders) container has been changed, from "C:\Documents and Settings", to "C:\Users". The folder "C:\Documents And Settings" will continue to exist, for backward compatibility, only as a junction point. On a mixed LAN, I would very carefully test sharing of either "C:\Documents and Settings" (with a Windows Vista client), or "C:\Users" (with a Windows XP client), before committing myself.

>> Top

Setting Up A Windows Vista Server
If you're adding a computer running Windows Vista to your network, you have to set it up as a server, so you can access it from your other computers. You do this using the Network and Sharing Center wizard, accessed by Start - right-click on Network, and select Properties. This is equivalent to running the Network Setup Wizard, in Windows XP.

  • Set the Network Location Type to "Private". This requires that your computers are secure, behind a perimeter firewall or a NAT router, and opens the standard Vista personal firewall to allow Server Message Blocks (SMBs) to pass between the computers. If your computer is directly connected to your Internet service, either get a NAT router, or leave the Network Location Type set to Public (which will prevent you from networking this computer).
  • Having set the NLT to "Private", you must now designate which services you wish for your server to provide or use. You should verify each setting before continuing, and change it if necessary.
    • File sharing.
    • Public folder sharing.
    • Printer sharing.
    • Password Protected Sharing (PPS) affects the above 3 services. Disabling PPS is the equivalent of enabling Simple File Sharing, in Windows XP.
  • Setup shared folders and printers. If you enabled PPS, you should setup access for individual users. If you disabled PPS, you setup access for "Guest" or "Everyone". Since Vista security is "deny by default (permit by demand)", "Everyone" doesn't automatically have access to newly created shares. Check the Security tab, for each share created, if you disable PPS.
  • Whether you setup the server with PPS Enabled (aka Advanced File Sharing, in Windows XP), or PPS Disabled, make sure that the account used for sharing is activated for network use.
    • If you Enable PPS, you can use either the Guest account, or a non-Guest account of your choice, but the chosen account has to be activated for network use.
    • If you Disable PPS, then the Guest account must be activated for network use. By default, Guest is disabled. If your server provides network access through the Guest account, be aware of its limitations.
    • Whether you use Guest, or a non-Guest account for access, the account used has to be added, explicitly, under Security, and under Sharing.
  • On a server running Windows Vista, the Administrative (Hidden) volume share of "C$ ("D$", etc) isn't defined, by default.

For an overview of the above, see Microsoft: File and Printer Sharing in Windows Vista

>> Top

Setting Up A Windows XP Server
If you have just one computer besides your computer running Vista, you may have to setup your first computer as a server too. On a computer running Windows XP, run the Network Setup Wizard. For a server connected behind a NAT router, select
This computer connects to the Internet through another computer on my network or through a residential gateway.
Running the NSW, and making that selection, is similar to setting the Vista NLT to "Private".

>> Top

Common Issues
Other than the network setup wizards used, Vista will be pretty similar to XP. You'll have the same challenges with Windows Networking.

>> Top

Editions Of Windows Vista and XP
There are 5 editions of Windows XP, which are basically 2 variants - Home and Pro.
  • XP Home is the equivalent of Vista Basic Home, with PPS permanently disabled.
  • XP Pro can use Advanced File Sharing (similar to PPS Enabled), or Simple File Sharing (similar to PPS Disabled).
  • The other 3 editions - Media Center, Tablet, and Pro x64 - are all variants of XP Pro, in terms of file sharing functionality.
  • With XP Pro, and with all editions of Vista, you can have Guest or non-Guest authentication. Note the limitations of Guest authentication carefully, some limitations aren't as obvious as they should be.
  • Whether you use the Guest account, or a non-Guest account, for authentication, make sure that the account used is properly prepared for network access.

There are also 5 well known editions of Windows Vista, plus several obscure ones which we probably won't encounter. The different editions of Windows Vista are completely different from Windows XP, in feature set differentation.

>> Top

Windows Vista and Older / Other Operating Systems
If you also have one or more computers running Windows 9x (95, 98, ME), you'll need to be aware of a significant difference between Windows XP and Vista, in Microsoft Windows And Authentication Protocols. But focus your mind on the future - Windows 95 / 98 / ME have a limited life span.

This will be a problem, too, if you have a Network Attached Storage (NAS) device. Many NAS devices, with unknown authentication abilities, will be a similar challenge. Some NAS devices will also try to act as a master browser on your network, and will cause master browser conflicts, and unreliable displays in Network (aka My Network Places).

>> Top

Windows Vista and Printers
If you are setting up your mixed LAN specifically to share a printer, note the additional challenges involved in sharing printers. Get file sharing working, first, then concentrate on getting working printer drivers that support Windows Vista. On a mixed network, the printer will have to support both Windows Vista, and Windows XP. And drivers for the client will probably differ from drivers for the server.

If you're having problems with printing from a computer running Vista, and the printer is shared by another computer, read Network Printing From A Windows Vista Computer.

>> Top

Windows Vista and Security
Depending upon what personal firewall you are using on your Windows Vista computer, you may have to set the firewall manually. It appears that Windows OneCare does not setup seamlessly, as Windows Firewall does, when you set the Network Location Type. And a recent change (September 2007) in Internet Explorer appears to affect Windows Networking access between computers.

>> Top

More References
For the above issues, and more, see

>> Top

Using The Internet As A WAN Link? Use A VPN.

Stable and secure Windows Networking depends upon properly designed, routed, subnets. IP routing was designed to make Local Area Networks connect, yet still observe geographical relationships. Using routers between LANs allows localisation of some domain services (browsing, name resolution), but wide spread availability of others.

When you route IP connectivity thru wiring that you own and control, that's behind a firewall, each connected LAN is as safe as any of the other LANs. Threats on the outside (Internet) stay on the outside. Two geographically separate LANs, connected by a dedicated, leased communication line, are as safe as each other is safe.

What if you have 2 LANs, distant from each other, and can't justify the expense (initial or ongoing) of a leased or owned communication line? If both LANs have Internet access, you can still connect them; just use the Internet as the WAN link.

But wait! I hope you know how dangerous the Internet can be. It's bad enough when accessing it as clients. Plain old web browsing is bad enough, how about running a server on the Internet? OK, how about running all of the computers on your LANs thru the Internet? Why not hold up a $100 bill, and stroll thru Times Square in New York City? See if you get anywhere alive.

But you can connect your LANs thru the Internet, if you design the connection properly. A controlled, encrypted tunnel between your LANs, using routers that support a Virtual Private Network (aka VPN) will do this fine.

A VPN will be a lot easier to setup, and more stable and secure, when properly planned.


>> Top

Each LAN Is Addressed By Its WAN Address.
The VPN routers setup static tunnels between each other. Setting up a VPN router requires identifying the other router(s), by its IP address as well as by a pre installed certificate (aka pre shared authentication key). If you can't provide a fixed IP address for each router, you'll have to use a domain name, registered with a dynamic DNS service like DynDNS, TZO, or the like.

>> Top

Hardware Compatibilty Is A Must.
There are various conventions and standards for establishing, and conducting, authentication and encryption in a VPN. Each router manufacturer will likely have some variation, however small. The easiest, and most stable, VPNs will use router hardware of the same make, model, and firmware level at each end of a VPN tunnel.

>> Top

LAN Subnets Must Be Unique.
A VPN provides a routed connection between LANs. In order for routing to work best, you have to have different subnets on each LAN. When you setup a VPN between LANs that were setup before being connected, you may have some LANs using the same subnet. You can't have stable LANs, each having the same subnet, connected by a router.

>> Top

Use DNS For Reliable Name Resolution.
On most small LANs, you'll use broadcasts for name resolution. Broadcasts aren't routable; each IP subnet is, by definition, a broadcast domain. If you want computers on one subnet to access computers on another (which is, presumably, why you're setting up a VPN), you'll find computer names more convenient than IP addresses. Some VPNs will, if configured, pass SMBs for name resolution and browsing, but this will likely slow down Windows Networking. DNS based name resolution is the best way to go, for anything more complex than a single local cluster of computers.

>> Top

Use Domains, Not Workgroups.
If you use Network Neighbourhood to identify and access other computers, you'll need browsing to work between the subnets connected thru the VPN. A properly designed domain structure will make browsing work much better.

>> Top

Connectivity Between Any LAN And The Internet Can Affect Its Connection With The Others.
A VPN connection between any two LANs requires regular interchange of control information, and irregular application data. Balanced connectivity makes both more predictable. If one LAN has a dual WAN business class DSL service, and the other has residential class dialup, how secure and stable will that VPN be?

>> Top

Security On Any LAN Can Affect The Others.
VPNs are used to connect geographically separate LANs, and imply some degree of trust between those LANs. The computers on any LAN, connected to a VPN, are only as secure as the computers on the LAN with the weakest security policies. Review, and synchronise security policies before setting up a VPN.

If you wish to setup a VPN between your home network and your work network, security at your work may be compromised. You should always get permission from LAN administration, before doing this. You may be legally at risk without such precautions.

>> Top

Increased Sophistication and Excess Bandwidth Mitigates These Issues.
As availability of VPNs has increased, with VPN capable hardware sold in WalMart and similar convenience stores, and as VPN firmware becomes more sophisticated, each endpoint in a VPN relationship will be better able to adjust to differences between its own environment and the environment present at the other end. Many of the above issues won't be quite as relevant in the future. But if you start out being aware of the issues, you will be prepared to deal with them when they do become relevant.

>> Top

Manual Network Setup Procedures

The Windows Network Setup Wizard, provided on computers running Windows XP, is a convenient way to setup your network. Sometimes though, you need to setup things manually.

In cases where you can't use the Network Setup Wizard, you'll be using the Network Connection Wizard.

  • Please start by reviewing Networking Your Computers, if you haven't already.
  • From Settings, open Network Connections. Find the network connection that you'll be using. The most common one is called Local Area Connection. Right click on the appropriate connection, and choose Properties. Make sure the following network components are installed, in the network items list.
    • Client for Microsoft Networks.
    • File and Printer Sharing for Microsoft Networks.
    • Internet Protocol (TCP/IP)
  • Make sure that the Internet Connection Firewall / Internet Connection Sharing (ICS) (pre-SP2), or Windows Firewall / Internet Connection Sharing (ICS) (SP2) service is running - Started and Automatic.
  • Configure your firewall setup, including installing any third party firewalls, after you run the wizard.


>> Top

Local Area Connection Properties
Start from the connection items list (Start - Settings - Network Connections in Windows XP). Right click on Local Area Connection, and select Properties. This will give you the Local Area Connection Properties wizard. If you have additional or alternate network devices, your connection may have a different name.


If you need to make changes to the network adapter, click on Configure. This will give you the Network Adapter Settings Wizard.


Make sure that the required protocols, for Windows Networking, are loaded. And make sure that you know what are loaded, and remove any that aren't necessary.


You'll likely be configuring TCP/IP as your primary network protocol. Double click on Internet Protocol (TCP/IP). This will open the TCP/IP Properties Wizard.


>> Top


In most cases, you'll use automatic (dynamic) settings.
  • Select Obtain an IP address automatically.
  • Select Obtain DNS server address automatically.
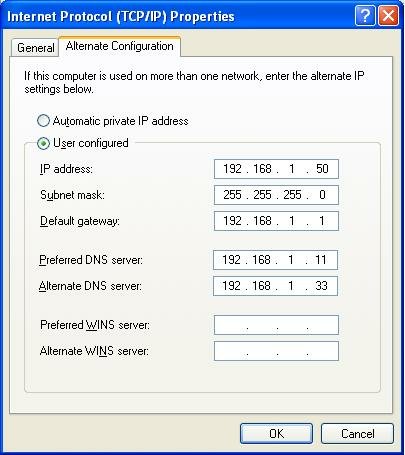
If you must make manual IP settings, you'll have up to 5 values to set.
  • IP address
  • Subnet mask
  • Default gateway
  • Preferred DNS server
  • Alternate DNS server
If you're just connecting 2 (or more) computers directly, IP address and subnet mask will be the only relevant entries. If you're connecting (2 or more) computers, and providing Internet service, you'll have also Default gateway and DNS servers to set.


>> Top


If you selected Obtain an IP address automatically, you'll have an opportunity to enter alternate settings too. If no DHCP server is available, you'll have static network settings, aka APIPA. This will let you connect with other computers on your immediate network (that are also using APIPA), and possibly other networks (with a gateway on the APIPA subnet).


>> Top

TCP/IP Properties - Advanced

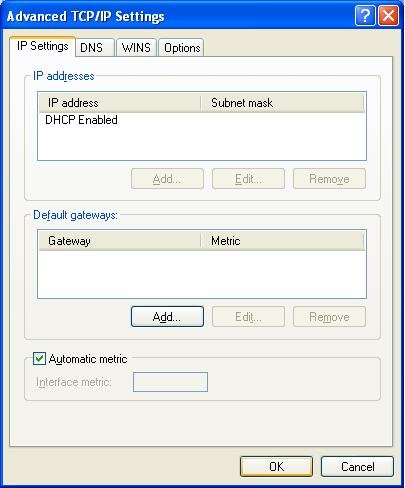
Sometimes you will need to make settings beyond the basic 5 on the TCP/IP Properties window. From TCP/IP Properties, hit the Advanced button at the bottom. This opens the Advanced TCP/IP Settings wizard.


If you selected Use the following IP address, you'll be able to have your computer use multiple IP addresses.

With either automatic or manual IP addresses, you'll have a chance to specify multiple gateways. If the default gateway isn't available, your computer will try an alternate gateway, automatically.

And here, you can adjust the metric for this connection. If you have multiple network connections, and one is faster or more reliable, you can influence IP routing. These selections are reflected in the static route table. This is important with a computer with multiple network connections.


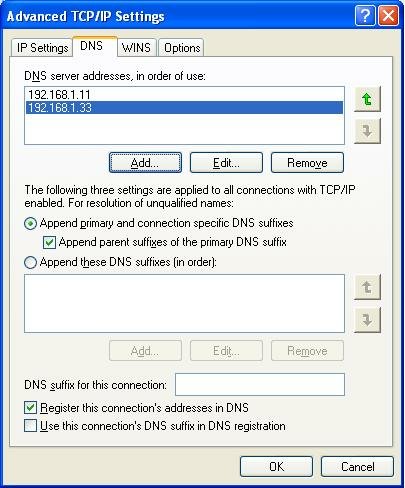
On the DNS tab, you have the ability to define more than 2 DNS servers. And additional DNS settings.


On the WINS tab, you will find the most frequently checked and set selection - the NetBIOS setting, aka NetBT.
  • If your LAN has a DHCP server (not a NAT router), you can select "Default", and control the setting from a setting in the DHCP server.
  • If you have a domain, and use DNS for name resolution, you can select "Disable", and use Direct Hosted SMBs.
  • If you don't know what any of this means, or if you have a small LAN without a DNS server, select "Enable".


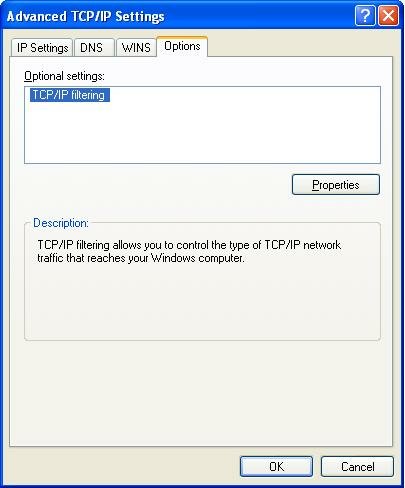
On the Options tab, you can set various TCP/IP filtering options.


>> Top

Setup WiFi - And WPA - Carefully

Setting up a WiFi LAN is a great experience. The convenience of surfing the web from your back yard, or sharing files between your main computer and your music server, without running wires here and there, is exhilarating. But there is stress involved.

When you connect a computer to a WiFi LAN, with WPA (and WPA-PSK is absolutely the minimum security measure that you should - no must - take), you are testing a number of things, simultaneously.

  • The WiFi router.
  • Your computer.
  • Your WPA setup.


Now if you do this carefully, and with a small amount of preparation, the whole project can take an hour - or less. Plan it wrong, or make a mistake, and you could be days figuring out the problems. Use a layered strategy - similar to layered testing.
  1. Get each computer connected, by Ethernet, to each other.
  2. Setup, and copy, a key set to each computer.
  3. Get each computer connected, by WiFi, with no security.
  4. Setup WPA on the router, and on each WiFi client.


The different WiFi router vendors have different ideas what type of key their WPA security should work with. Steve Gibson's GRC "Perfect Passwords" Generator will give you a choice of 3. Here's an example of what you might be provided when you click the latter link. Try it, and see.
  • 64 random hexadecimal characters (0-9 and A-F) (not case sensitive):
    1DBE12287EC82B22233C74B356BAC5E4EDC1447168B5F5A9C985C154220E0568

  • 63 random printable ASCII characters (case sensitive):
    Hb+r#^S-T/1!JTP0_~SB 4&rQ7|s"q)7S`teMB`]x_uGATQQ-{B:=%W/_")$w6h

  • 63 random alpha-numeric characters (a-z, A-Z, 0-9):
    0btNigYpFmG5MGDBahRnw203t6jQlCYCNcuvCYgGAZVCFSLSwp7deBMj9Iy7Vfr


All I do is to go to the web page (where it generates a new key set each time - try it), copy the six lines (as in the above list) to a Notepad file, and save the file. Then, with all computers connected by Ethernet (step 1 above), copy the file to each computer. Depending upon the router, one key may work properly, while another won't. Having 3 possibilities, in an identical set on each computer, means repeatedly copying and pasting, without having to worry about getting the computer back online, by other means, to simply copy another file.

After you copy the key set to each computer, start up the WiFi radio, and the WiFi clients. Start with WiFi in open (unencrypted) mode. Make sure that the router works, and you have a working signal, by testing without setting up security.

Since you'll probably be testing the router connection by loading a web page, decide how comfortable you are with giving your neighbourhood open Internet access while you test. If you're not comfortable, then disconnect the Internet feed from the router, while you test, and load the router management web page for your test. Reconnect the Internet service after you get WPA security working.

After you can connect the computer without security, and all network functions work, add WPA-PSK security.
  • Configure the router - copy the appropriate portion of 64 random hexadecimal characters into the router management program.
  • Copy the identical portion of 64 random hexadecimal characters into the client computer WiFi client manager setup wizard.
  • Test the WiFi client. If it works, fine. If not, repeat these steps, trying the 63 random printable ASCII characters, and finally the 63 random alpha-numeric characters.


This is 3 times as complex as it needs to be, and after you've done this a few times, you'll be able to simplify these procedures. But for the first couple times you do this, the careful planning, and the lowered stress level, will make it easier to not make mistakes. By not making mistakes, you're more likely for this to work. And making it work is the reason for my writing this in the first place.

>> Top

Setting Up A WiFi LAN

Are you new to networking, or have you setup a few networks in the past? Networking looks really complicated (it can look that way), but it's basically just hooking up a few wires, and praying real well.

Setting up an Ethernet LAN is pretty simple, but it contains one annoying detail. With a wired LAN, unless the computer and router are right next to each other, you have to figure out how to locate the Ethernet cable that connects them. With a wired LAN, you have cables everywhere.

A WiFi LAN lets you remove the cables. With more work in the beginning, you're freer in the end. Without a simple physical cable, which you can see and touch, you have to setup a wireless connection, that you can't see or touch. But know, and understand, the limitations of WiFi.


Make It Easy For Yourself - Design The Installation Properly
Purchase The Right Equipment. You can setup a WiFi network without using a router / WiFi access point - this is called ad-hoc WiFi. But setting up an ad-hoc WiFi network is more complicated, and less secure, than an infrastructure (router / WAP based) network.

Plan The Installation
Read The Manual. Having carefully selected your WiFi Access Point / Router, and your WiFi Client Adapters, you hopefully spent some time acquainting yourself with their features. Now, spend some time perusing the guides and instruction manuals. Doing so is a good investment of your time.

Test As You Go. If this is the first time you've setup WiFi equipment, you may benefit from testing as you setup. Having 2 computers is a very good idea
  1. Connect one by Ethernet to the AP, and use it to make changes in the AP settings.
  2. Connect a second by WiFi, and use it to test the changes to the AP.
Having 1 computer, doing dual duty, can be done; but having 2 computers is a lot less stressful.

Stage The Installation. Setting up a WiFi LAN can be pretty stressful - it's 3 or 4 times as complicated as setting up an Ethernet LAN. If you plan, and setup in stages, you can reduce your stress level significantly.

Setup The Access Point / Router
You still need an Ethernet cable when you setup the access point / router. Whenever you make configuration changes to a router (wired or wireless), the router may have to restart itself. When that happens, you will lose connectivity. Reestablishing connectivity with a wired connection is bad enough; reestablishing a wireless connection in some cases (if, for instance, you get the WPA key wrong) will be impossible. Always connect by Ethernet, if not absolutely impossible, when making changes.

Even though you may have bought the router that afternoon, it may have been sitting in the store for a while, and the vendor may have issued firmware updates for it since it was shipped from the factory. Check with the vendor, and see if any firmware updates are available.

  • Setup your computer as a DHCP client.
  • Install an Access Point / NAT router, and give it power.
  • Connect an Ethernet cable to the router, and to your computer.
  • Power your computer up.
  • Connect your computer to the router thru your browser.
  • Install any available firmware updates to the router.
  • Make all the necessary IP and WiFi settings to the router.


NOTE: Most access points and routers, wired or wireless, will come with installation guides and configuration utilities, and some will offer to install software on your computer. If you plan your installation properly, no additional software should be necessary. Your Windows system has a browser, and that should be all the software that you need to connect to your access point or router. Don't install unnecessary software.

The changes to a WiFi access point / router include Internet Protocol settings (like a wired NAT router), and WiFi settings. WiFi settings include:

  • Connectivity settings.

    • Channel. You need a channel with no other devices within range, to get maximum bandwidth.

      • You can choose from any channel number 1 - 11 (in the USA). To minimise interference, and maximise satisfaction between WiFi neighbours, we choose between 3 non-overlapping channels 1, 6, and 11.


        Non Overlapping Channels
        Bottom ("1")
        Middle ("6")
        Top ("11")


      • With 802.11g-super, there is no channel choice. If a channel number is displayed, it will be "6", and be unselectable.
      • If there is any other network within range, using any channel which your router may use, you won't get maximum bandwidth. You will have to share the channel with your neighbor.

    • Interoperability. What standard will you use - 802.11b, 802.11b/g, 802.11g, or the newest (and currently not complete) 802.11n?

      • With 802.11b, you'll get a maximum bandwidth of 11M (half duplex).
      • With 802.11b/g (having a combination of 802.11b and 802.11g devices on your LAN), you will get between 11M and 54M (probably substantially less than 54M though). (Again, half duplex).
      • Only with 802.11g will you have a prayer of getting a full 54M (and that's with no 802.11b networks anywhere visible). (And still, half duplex).
      • If you have 2 802.11Super-G devices, from the same vendor, and no other WiFi devices are within range, you might be able to get 108M.
      • If you get 802.11n equipment, and have no other networks within range, you might get 108M or higher. This simply can't be objectively predicted, for any location, though.


  • Security settings.

    • Authentication. How will the wireless clients identify themselves to the router?
    • Encryption. How will the wireless clients keep your communications, between themselves and the router, private?
    • Logging. How will YOU know what is happening on your WiFi LAN?
    • Visibility. Hiding the SSID will not help you, and may hurt network performance. Setup a unique, yet not personally identifying SSID. If you have multiple APs, use the same SSID on each AP, to enable roaming by the clients.
    • The issue of Security is covered, in detail, in my article Setting Up A WiFi LAN? Please Protect Yourself!. Please note the above details.


Setup The Clients
Having made the necessary changes, you are free to turn the radio portion of the router on, and to setup the wireless clients. If your main computer also has a WiFi adapter, you can now remove the Ethernet cable between that computer and the router (but keep the cable handy for any future changes that you may make).

Setting up a wired LAN is simple - you connect the cables, things you can see and touch. With WiFi, you have the access point(s) out there - but you can't see or touch them. With WiFi, you setup the WiFi Client, which is a program provided by several vendors. Depending upon your setup, you may have any or all of these clients.

  • The computer manufacturer.
  • The WiFi adapter manufacturer.
  • Microsoft.
  • NetStumbler.

Before you install the WiFi adapter on your computer, check with the vendor, and see if any driver updates are available. This may include an update to the vendor's WiFi client.

Your access point can have only one WiFi Client managing it; having more than one Client active can cause conflicts. Conflicts can cause erratic performance, loss of connectivity, even the WiFi adapter may turn itself off. Know the possibilities, and only run one WiFi Manager at a time. If you choose to use the native Windows product - Wireless Zero Config aka WZC, consider applying the Wi-Fi Protected Access 2 / WPS IE (updated January 2007) update.

Each WiFi Client will present you with a list of visible access points. You choose, by signal strength, channels, and name, with which access points you wish to associate. The access points that you choose become your Preferred Access Points. The WiFi Client may periodically scan the spectrum for the strongest access point, and connect your computer to that access point. Note that this behaviour may be subject to SSID Visibility.

Any access points that you do not choose are still available for your use. Your WiFi Client probably has a selection to this effect - "Automatically connect to non-preferred networks", for instance, is a selection with the Windows Wireless Zero-Config Client. Make sure that this selection is not enabled automatically. You do not want your client to connect to your neighbors WLAN unexpectedly.

Some Clients also let you prioritise the preferred access points - so you make a list, then you order the list, from top (most preferred) to bottom (least preferred). Your client will then automatically connect you, at any time, to the more preferred access point that is available.

With any access point of interest, if it uses any authentication or encryption, you will have to enter the appropriate information. Your client will create a profile for that access point, and keep that profile available for the future. When you remove an access point from your preferred list, you will delete the profile. You will then have to re enter the profile information later.

Without the correct profile information, you cannot connect to the network provided by the access point. If your client tells you that you are connected (however strong the signal), but you have no IP configuration, check the profile. If in doubt, delete and re enter the profile.

Whenever you setup a WiFi client profile, make sure that you select the appropriate authentication options. Selecting 802.1x authentication, without the complete infrastructure, will cause problems.

When you setup the WiFi client, you'll be using the setup wizard provided by the vendor (or Microsoft). Understanding the above issues, and reading the instruction manual or guide for the WiFi equipment, is essential. See, for instance, Windows Cable Guy Windows XP Wireless Auto Configuration.

Tune The Wireless Setup
Having done the Initial Setup, and having Secured your WiFi LAN, you may want to tune the physical setup. Maximum bandwidth is based upon maximum signal strength. There are a few things that you can do, when installing the equipment, that will prevent you from getting maximum signal strength.

Having completed all of the above tasks, enjoy the freedom.

>> Top

Networking Your Computers

Setting up a computer network, whether to share files, or Internet service, can be a lot of fun. It's more fun, though, if you set it up properly, from the start. I'll try and make that possible, if you work with me.


>> Top

With the basic issues out of the way, you can get detailed instruction from plenty of websites, that will give you illustrated instructions. Here are but five, listed in alphabetical order.

If you have properly chosen and setup your equipment, advice from any one of the above should get your network in order. The various guides are written by different organisations, and each has a different style, so check them all out if possible. Find the one which works best for you.

>> Top

Solving Problems
If you're here because you have problems, please start by reading Solving Network Problems.

Now, what is your specific problem? Is it accessing the Internet? Then read Troubleshooting Internet Connectivity. Or is the problem with File Sharing? Then read Troubleshooting Network Neighborhood (Windows Networking).

One major issue that the websites listed above won't help you with, if your problem is with file sharing, is the browser. Now when I mention the browser, don't start with "My Internet access is not a problem". The browser is the program that provides the contents of Network Neighborhood on your LAN. It's frequently involved in problems when "I can't see the other computers", or "I get access denied when I try to access another computer". Please read my article Windows NT (NT/2000/XP/2003) and the Browser.

Do you have a LAN with both Windows 9x (95, 98, ME) computers and Windows NT (NT, 2000, XP) computers? Then you should read Windows 9x (95/98/ME) and the Browser.

>> Top

In Conclusion
All of the above articles link to dozens of other articles, so read carefully. And be patient with me, as I add to this blog occasionally. Check back here periodically. Or write to my Guestbook.

>> Top

Connecting Two Computers With A Crossover Cable

Most of my articles in this website are about Windows Networking / File Sharing, or about Internet Connectivity, and start by assuming that you have several computers, and a hub (router / switch) connecting them. But what if you have just 2 computers, and just want to quickly move files between the two? Or maybe you want to setup Internet service, for the 2 computers, without using a router to share the service?

You don't always require a hub (router / switch) to connect just 2 computers.


>> Top


Make The Right Decision
Start by asking yourself - what do you want to do - both now, and in the future? If you just want to immediately connect just these two computers, and quickly move files between the two, without Internet service, then this is the right start.

If your future might include Internet service, or if you might end up with a third computer, then you would really be better off using a hub (router / switch).

If you want to connect the two computers, and share Internet service, you can do that using a crossover cable. But know the issues before you start.
  • If the computer with Internet service has it thru a dedicated modem, either:
    • Internally installed.
    • Connected externally, but thru a serial cable.
    • Connected externally, but thru a USB cable.
  • then using a crossover cable is a valid solution.
  • If the computer with Internet service has it thru an Ethernet connection, or thru WiFi, then this is not a valid solution. If the Ethernet or WiFi connection is on subnet 192.168.0/24, this will not work at all. In the latter case, you will have to connect both computers directly to the LAN with subnet 192.168.0/24. If the Ethernet or WiFi connection has a private LAN address (10.0.0.0/8, 172.16.0.0/12, or 192.168.0.0/24), you're behind a NAT router, and you should setup a bridge, rather than use ICS.


>> Top


Use The Proper Equipment
The simplest solution, for networking just 2 computers, is to get an Ethernet crossover cable, and connect the two directly. A single crossover cable is the equivalent to getting a hub (router / switch), and a pair of straight-thru patch cables.

Please use Ethernet, not Firewire or USB, for connecting your computers. Firewire / USB networking requires extra drivers, and extra work. Ethernet drivers are native in all modern operating systems.

Please use a Cross-over Ethernet cable. A Straight-Thru, aka Patch, cable may work for some newer systems, which can automatically sense the need for a cross-over. But a cross-over cable will work all of the time, when you need to connect two computers directly.

Patch cables may come in many colours and lengths; some computer stores will have dozens of choices to suit your cabling needs. Cross-Over cables, when you find them in the store, will be explicitly labeled "Crossover", and will come in one colour (probably orange), and one length (probably 3 or 5 foot).

Please buy a properly made cross-over cable. If you're a masochist, or extremely desperate, you may make your own from a pair of patch cables, properly spliced. But Ethernet cables, that support modern high speed networks, require precision in their construction. I'm a fan of do-it-yourself activity (as in the reason for this website), when it's properly planned. I don't recommend do-it-yourself Ethernet cabling, when you're setting up a network. Buy a cable, unless you're very experienced with networking and can easily recognise the possible problems.

If you replace the two Ethernet adapters, one on each computer, with two WiFi adapters, you may be able to eliminate the Ethernet cable and setup an ad-hoc WiFi network. A WiFi based ad-hoc network isn't terribly different from an Ethernet based ad-hoc network, once you get the WiFi connectivity working.

Use the Device Manager in Windows, and test the network adapter in each computer. Connect your cross-over cable to the two network adapters. Observe the lights on the network adapters, and / or the status indicated by the Local Area Connection icon in the tooltray - do both computers indicate successful electrical connection?

Now, will you be setting up your network to Share Internet Service? Or just to share files, with No Internet Service?


>> Top


Setup The Network - No Internet
If you just have two computers, and no Internet service to either, run the Network Setup Wizard on each computer. Select the last option
This computer belongs to a network that does not have an Internet connection.

Having connected the two computers physically, and checked that you have no physical problems, you need to make the logical (TCP/IP) settings. If you have Windows XP / Vista, or other current operating systems on your computers, you're in luck. Modern operating systems use a system called APIPA, and should be able to provide ip settings automatically, so the two computers will connect to each other. If you allow the two computers to dynamically assign addresses, APIPA should take care of this for you.

Be prepared to get an error message - Limited Or No Connectivity - if you use APIPA configuration.

NOTE: if any of your computers are NOT running Windows XP / Vista, you'll have to set the IP address and subnet mask manually, on those computers. Remember IP addresses have to be unique for IP addressing to work.
  • Run "ipconfig /all", from a command window, on each APIPA compliant computer first.
  • Make a list of which addresses are automatically assigned.
  • Manually configure each non-APIPA compliant computer.
    • Set each computer up with a unique IP address, in the 169.254.x.x subnet (written as 169.254/16 in many cases).
      • Each computer gets a subnet mask of "255.255.0.0".
      • Each computer gets an IP address of "169.254.x.x", where the "x.x" MUST be different for each computer. Check your list of addresses assigned by APIPA!
      • Each value of "x" must fall between 1 and 255 (not including either 1 or 255).
    • You assign IP addresses using the TCP/IP Properties wizard. Select "Use the following IP address". Only worry about IP address and Subnet mask - the other settings are only useful if you have an outside connection. With locally connected computers, just IP address and Subnet mask are essential, and should be assigned as described above.

Having connected the two computers physically, and checked that you have no physical problems, next Verify The Network - make sure that it works properly.


>> Top


Setup The Network - With Internet
If you have two or more computers, with Internet service to one, and wish to share the service to the others, run the Network Setup Wizard, first, on the computer that has Internet service. Select the first option
This computer connects directly to the Internet. The other computers on my network connect to the Internet through this computer.

You'll probably be running ICS on this computer. Note the disadvantages and requirements of ICS, and a possible alternative. You'll have to have two separate network connections (one might be a modem, directly or internally connected). You'll indicate which connection provides the Internet service, and then which connection(s) are to be used for sharing the Internet service.

If, per the ICS alternative, you decide to use a bridge, remember that both of the network adapters, on the bridged computer, will have the same IP address. Plan your testing accordingly.

If you decide to use ICS, run the Network Setup Wizard on the other computers, and select the second option
This computer connects to the Internet through another computer on my network or through a residential gateway.

If you can't run the Network Setup Wizard on any computers, use the TCP/IP Properties wizard, and select automatic configuration.

If the second computer will be running as a server, and providing data to the Internet, remember that the ICS server will have to be online constantly. Having dealt with that requirement, setup the ICS server to (KB231162): forward the right ports to the Internet server.

Having connected the two computers physically, and checked that you have no physical problems, verify that the network works properly.


>> Top


Verify The Network
Please verify that you have connectivity between the computers first.

  • Run "ipconfig /all" on each computer, from a command window. Note the IP address and subnet mask for each network connection.
  • Make sure that you don't have a bridge, on any computer, unintentionally.
  • Verify that all computers are on the same subnet, and that each has a unique address.
    • If this is two computers without Internet service, each computer should have an address of 169.254.n.n, and a subnet mask of 255.255.0.0. This will indicate that each is on subnet 169.254/16.
    • If this is two, or more, computers sharing Internet service, the first computer (thru which the others will be getting Internet service) must have an address of 192.168.0.1, and a subnet mask of 255.255.255.0 (on the connection used for sharing the Internet service). All of the computers getting Internet service thru the first computer must have an address of 192.168.n.n, and a subnet mask of 255.255.255.0, and show both DHCP and Autoconfiguration Enabled = Yes.
  • From each computer, again in a command window, ping the other. If, for instance, the address on Computer B is "169.254.1.2", open a command window on Computer A, and enter:
    ping 169.254.1.2

    If you get back a series of responses like
    Reply from 169.254.1.2: bytes=32 time<1ms TTL=128
    Reply from 169.254.1.2: bytes=32 time<1ms TTL=128
    Reply from 169.254.1.2: bytes=32 time<1ms TTL=128
    Reply from 169.254.1.2: bytes=32 time<1ms TTL=128

    then you are ready.

When you open Windows Explorer on each computer, and look in Network Neighborhood, you should see both computers. And when you open (doubleclick on) one entry, you should see the folders and files.

And, if the computer directly connected to Internet service can access the Internet, the other computers should be able to do so also.


>> Top


Troubleshoot The Network, If Necessary
So what if it doesn't work, per the basic testing above? Well, now you start troubleshooting, and methodically, in the right sequence.


>> Top

File Sharing On A LAN With Two Routers

File sharing on a LAN with a single segment (all computers connected to the same router) is fairly simple. Windows Networking uses Server Message Blocks (SMBs) broadcast between all computers. In most networks, SMBs are transported over IP.


  • Browser broadcasts help to advertise the existence of a computer to the others. This enables each computer to be displayed in My Network Places / Network Neighborhood.
  • Name resolution broadcasts help a computer find out the IP address of another computer. With Windows Networking transporting SMBs over IP, accurate and complete IP information is essential.

If you use Windows Networking in its native form, by opening My Network Places, and clicking on a server name, to see a list of its shares, you're using broadcasts. If you try to access a server by name, you're probably using broadcasts.

Now, you can't have every computer in the world broadcasting to every other computer. So, SMB broadcasts, by design, don't pass thru routers. One router = one subnet = one broadcast domain.

What if you need to have two or more routers on your LAN, but you need to have just one broadcast domain, so you can share files everywhere?

  • The primary router is to be next to the broadband modem, and you have to run a long cable to another room, with a secondary router, to connect wireless computers in there.
  • The primary router ran out of ports, so you used the secondary router to add capacity to your LAN.
  • It's simpler to run 1 cable elsewhere, and share that one cable using a router, than to run 2 (or more) separate cables from the primary router.
  • Your Internet service includes a modem that can only connect to the primary router. The primary router may be a computer running ICS.
  • The primary router is a wired router, and the secondary router is wireless.

In this example, you've got a pair of routers, and 4 computers. Router 1 is connected to your Internet service. Computers A and B, and Router 2, are all connected to Router1. Computers C and D are connected to Router 2. You have Computers A and B on their subnet (LAN 1), in one broadcast domain, and Computers C and D their subnet (LAN 2), in another broadcast domain.

That's a perfectly reasonable setup for Internet service, but it's not-so-great for file sharing. Computers A and B can see, and access each other. Likewise, Computers C and D can see and access each other. But neither Computer A nor B can see nor access C or D, and vice versa. It would be simpler if you would just get rid of Router 2, connect all computers to Router 1, and everything would be fine.

Maybe using 2 routers is something you just can't avoid, but nobody said that they have to both work as routers. What you do is only use Router 2 as a switch (or a WAP, if it's wireless) - you can still connect the computers to it, but Router 1 will be the only functioning router. It's a simple solution.

If you're lucky, and have a high end NAT router, your router may have a switch - maybe physical, maybe set in the router setup - that will put it into "Access Point Mode" or similar. Check your owners manual.

If not, you simply change the way the router is connected, and used.

In this exercise, the Router 1 LAN is 192.168.0.1, and the Router 2 LAN is 192.168.1.1.

  • Don't connect the WAN on Router 2 to anything. Connect a LAN port on Router 1, and Computers C and D, as peers, to a LAN port on Router 2.
  • Disable the DHCP server on Router 2.
  • Change the LAN on Router 2 from 192.168.1.1, to 192.168.0.254 (or any other address not in use, and not part of any DHCP scope).
  • Are you using DHCP on your LAN? If so, make sure that the DHCP server, on router 1, has a scope defined large enough to service all of the computers.
  • Restart each computer, so it gets a new IP address. This may always not be necessary with Windows XP / Vista, but be prepared to do this.

In a variant of this setup, Router 2 is distant from Router 1, and you won't be running Ethernet cables between the two. You'll configure Router 2 the same as in the above scenario, then put it into client mode connected to Router 1 by WiFi. Router 2 then becomes a WiFi bridge client, and provides service to Computers C and D, which connect to it by Ethernet.

And that's all you have to do. Router 1 is the only router (remember, the router has to sit between your LAN and the Internet, so that has to be Router 1). Router 2 still provides connectivity for Computers C and D, but it's working now as a switch (or WiFi AP). And all 4 computers - A, B, C, D - are now on the same broadcast domain, and the same subnet.

For another description of this solution, see DSLR Forums Using a Wireless Router as an Access Point (#11233)

>> Top

Using The Network Setup Wizard in Windows XP

There are a lot of network settings in any Windows operating system. The many settings can affect how your computers connect to each other, and to the Internet. The Network Setup Wizard is provided as a part of Windows XP, to make the more common settings, for you. In Windows Vista, you'll use the Network and Sharing Center wizard.

The Network Setup Wizard is most useful when run on a properly designed, setup, and prepared network.

  • Make sure the following network components are installed, in the network items list in (Name of connection) Connection - Properties.
    • Client for Microsoft Networks.
    • File and Printer Sharing for Microsoft Networks.
    • Internet Protocol (TCP/IP)
  • Make sure that the DHCP Client service is running - Started and Automatic.
  • Make sure that the Internet Connection Firewall / Internet Connection Sharing (ICS) (pre-SP2), or Windows Firewall / Internet Connection Sharing (ICS) (SP2) service is running - Started and Automatic.
  • Configure your firewall setup, including installing any third party firewalls, after you run the wizard.


I know of several ways to start the wizard.
  • From (Start - Programs - Accessories - Communications - ) Network Setup Wizard.
  • From Windows Explorer, with Common tasks enabled.
    • In Network Connections, look under Network Tasks.
    • Select
      Setup a home or small office network.
  • From the Help and Support Center.
    • Start Help and Support.
    • Search on "Network Setup Wizard".
    • Under "Pick a task", select "Start the Network Setup Wizard".
      To start the Network Setup Wizard
      You must be logged on to this computer as an administrator to complete this procedure.
      1. Start the Network Setup Wizard.
      2. Follow the instructions on your screen.
    • Select the shortcut in "Network Setup Wizard".


The Network Setup Wizard will run on your computer only if
  1. You are logged in with administrative authority.
  2. Your computer is not joined to a domain.


When you run the Network Setup Wizard, you are given a total of five choices, on two screens, which identify how you connect your home or small office network to each other, and / or to the Internet. See Practicallynetworked XP ICS - Starting the Network Setup Wizard for more graphical instructions.

Alternatives
The Network Setup Wizard is a Windows XP component. If you have a computer running another version of Windows, like Windows 98 or ME, you can run NetSetup. Copy NetSetup.exe from "C:\Windows\System32" to a CD or a USB flash drive, carry the CD or flash drive to the target computer, and run it from there. You are under no obligation to copy anything to any device or drive; any settings that you make on this computer, using the Network Setup Wizard, you can make on another computer, manually. The Network Setup Wizard is simply a convenience tool.

You can do just what NetSetup.exe, or the Wizard, does, on any computer running Windows XP, 2000, 98, or ME.
  • Install any missing network components, from Network Neighbourhood - Properties - Configuration.
    • Client for Microsoft Networks.
    • File and Printer Sharing for Microsoft Networks.
    • TCP/IP.
  • Set the Computer Name, and Network Name, from My Computer - Properties - Computer Name, or Network Neighbourhood - Properties - Identification.
  • Set TCP/IP to obtain IP and DNS server addresses automatically, from Network Neighbourhood - Properties - Configuration - TCP/IP Properties.


Note that the Network Setup Wizard only makes very basic system settings, and doesn't check for the presence and configuration of other computers on the network. If you run the Wizard, and you don't get the results that you expect, you'll need to read either Troubleshooting Network Neighborhood Problems (for local access problems), or Troubleshooting Internet Service Problems (for Internet access problems). You may also benefit from reading Solving Network Problems. Be persistent.

If you cannot run either NetSetup.exe or the Network Setup Wizard, on any computer, you can still setup your network. On a computer with Windows 2000, or in any other case where neither netsetup nor the wizard can be used, you can make all settings manually.

ICS Host
This computer connects directly to the Internet. The other computers on my network connect to the Internet through this computer.

This network configuration uses (KB306126): Internet Connection Sharing (ICS) to share this computer's Internet connection with the rest of the computers on your network. Communication to and from the Internet to all the computers on your network are sent through this computer, called the ICS host computer.

If you're going to use an ICS host to provide Internet service for your network, please use (KB283673): Internet Connection Firewall (Windows pre-SP2), Windows Firewall (Windows SP2), or a third party personal firewall at all times. Please don't ever connect an unprotected computer to the Internet.

Note the other disadvantages and requirements of ICS. You'll have to have two separate network connections (one might be a modem, directly connected). You'll indicate which connection is to be used to connect to the Internet. Other connections on the computer will then be used for sharing the service.

As an ICS Host, the wizard will perform steps 1 - 11, from the list of Actions below.

Gateway (ICS or NAT Router) Client
This computer connects to the Internet through another computer on my network or through a residential gateway.

This computer is part of a home or small office network that connects to the Internet through another computer on the network or using a residential gateway (i.e., a NAT router). If you have another computer on your network that shares its Internet connection, called the ICS host computer, this computer will be able to send and receive e-mail and access the Web, as if it were connected directly to the Internet.

A residential gateway is a hardware device that works similarly to a host computer. Typically, a DSL or cable modem connects to the Internet service, and the residential gateway connects to the modem. Internet communication is shared by the residential gateway to all of the computers on your network.

As a NAT Client, the wizard will perform steps 1-5, then 10-11, from the list of Actions below.

Multiple Direct Internet Connections
This computer connects to the Internet directly or through a network hub. Other computers on my network also connect to the Internet directly or through a hub.

This network configuration typically has an external DSL or cable modem connected to an Ethernet network hub. The other computers on your network are also connected to the network hub. Each computer on the network has a direct connection to the Internet by means of the network hub and DSL or cable modem.

If you are using this configuration for your home or small office network, I highly recommend that you disable file and print sharing on the TCP/IP protocol and enable it on the IPX/SPX protocol. If you share files and folders on your computers using the TCP/IP protocol, they could be seen on the Internet. Only enable IPX/SPX for file and printer sharing if you are using this network configuration for your home or small office.

I do not recommend this network configuration. It exposes all computers on the network directly to the Internet, creating potential security problems. I highly recommend that you use a secure host device, such as a computer running Windows XP with ICS and Windows Firewall enabled, or using a residential gateway.

As a Directly Connected Client, the wizard will perform steps 1-5, then 10, from the list of Actions below.

Single Direct Connection To The Internet
This computer connects directly to the Internet. I do not have a network yet.

Select this option if you only have one computer and it has an Internet connection. The Network Setup Wizard configures this computer to use Windows Firewall, to protect your computer from intrusions from the Internet.

Networked Locally But Not To The Internet
This computer belongs to a network that does not have an Internet connection.

Select this option if you have two or more computers networked together, but don't have an Internet connection. You can have a home or small office network, using Ethernet, a home phoneline network adapter (HPNA), or wireless adapters. If you have different network adapter types, such as Ethernet, HPNA, or wireless devices, installed in your Windows XP computer, the Network Setup Wizard can create a network bridge to allow all of the computers in your network to communicate.

If you're lucky and have Ethernet on both computers, you can use a hub and Ethernet cables to connect your computers. This is, by far, the best choice in your case. If you're connecting just 2 computers, you can even use a cross-over cable, instead of a hub.

Actions Taken By The Wizard

Depending upon the Option selected, the wizard will do any of the following:
  1. Set the computer name, computer description, and workgroup name that you specify.
  2. Install these network components if they're not already present:
    • Client for Microsoft Networks.
    • File and Printer Sharing for Microsoft Networks.
    • TCP/IP.
  3. Share any printers connected to the computer.
  4. Create the "Shared Documents" folder, if it doesn't exist.
  5. Share the "Shared Documents" folder.
  6. Enable Internet Connection Sharing, on the network connection that you specify.
  7. Enable the Internet Connection Firewall (pre-SP2) / Windows Firewall (SP2), on the shared network connection.
  8. Create a Network Bridge, if more than one local area network connection exists.
  9. Configure the local area network connection (or Network Bridge), using IP address 192.168.0.1/24.
  10. Configure the local area network connection, to obtain an IP address automatically.
  11. Install software, to allow the client to control the host's Internet connection.


>> Top