Showing posts with label Tools. Show all posts

Analyse Your WiFi Environment Objectively #2

When you have a WiFi LAN, and want to find out why it doesn't perform as well as you'd expect to, the first thing most folks will instruct you is

Do a WiFi site survey. Find out what your neighbours are doing.
When a site survey must be done, the best known procedure is to run NetStumbler.

But NetStumbler, for all its highlights of being easy to use, and well known, has shortcomings.
  • It doesn't support 802.11n client equipment.
  • It doesn't reliably detect 802.11n networks.
  • It doesn't run under Windows Vista.


Fortunately, there are new WiFi spectrum analysers, available now, that may provide help where NetStumbler fails. Two such products are InSSIDer (from MetaGeek), and the Xirrus Wi-Fi Monitor Gadget for Windows Vista.

>> Top

Diagnosing A WiFi Problem Requires Proper Tools

A WiFi connectivity problem can cause many symptoms - from inability to access other computers on the LAN, to lack of bandwidth when downloading files from Internet servers. But there are many factors that can cause those symptoms, and more. Diagnosing WiFi problems by observing bandwidth or connectivity symptoms is just not proper procedure.

You need the right diagnostic tools, and I start with Netstumbler, and PingPlotter.

>> Top

The Run Window

Many times, when I ask somebody to diagnose their problem, I'll ask for useful material like an "ipconfig" log. I'll ask that they

Open a Command window, and type "ipconfig /all".
and they respond with
I did. A window opened, and closed, and I couldn't read a thing.


What was just described was not the Command window, it was the Run window.


The Run window works great, for Windows applets. Use the Command window for Command applications. Simply type "cmd" here, and hit the Enter key, or the OK button, when you are producing a diagnostic log that I request.


And a Command window should open for you.


>> Top

The Command Window, In Windows Vista

Many problems in Windows can best (or sometimes only) be resolved by commands entered in a command window. This is still true, on computers running Windows Vista. Under Vista, you will use the command window slightly differently from earlier versions of Windows.


A Command Window (the title may vary, widely)


  • Click the Start button.
  • Click All Programs.
  • Click Accessories.
  • Right Click on "Command Prompt".
  • Left click on "Run as Administrator".
  • Click the Allow button if it asks you for permission.
  • A new window, with varying title, will open.
  • Now type whatever you need, into the Command Prompt window, with the cursor positioned for you after the ">", and hit the Enter key after each command.
  • Remember to allow for the Path, and the location of the program that you're running, if necessary.
  • Close the window when convenient.


If you run ipconfig, for instance, as

C:\Users\YourAccount>ipconfig /all

you will get the ipconfig output there in the command window. This is good to look at briefly, but isn't very good to copy. Copying from the command window can be done, but will be hard to read.

Redirected Output
By redirecting the output, you can view it and / or copy it in a more convenient way, so it's suitable for posting online. Instead of typing

C:\Users\YourAccount>ipconfig /all

type

C:\Users\YourAccount>ipconfig /all >ipconfig.txt


With the latter command, instead of getting the ipconfig output there in the command window, all you'll see in the command window is another "C:\Users\YourAccount>". Then, type

C:\Users\YourAccount>notepad ipconfig.txt

and Notepad will open with the ipconfig output in a more viewable, and copyable, format.

(Note): If you get an error "Access denied" when you run a command and redirect the output, you may be attempting to redirect output into a file in a folder that you aren't permitted to write into.

Try redirecting into a folder that you are permitted to write into. If the command window opens in "C:\Users\YourAccount", just redirect there.

C:\Users\YourAccount>ipconfig /all >ipconfig.txt

then
C:\Users\YourAccount>notepad ipconfig.txt


Concatenated, Redirected Output
Do you need the output from two commands, run one after the other, presented in a text file? Be sure to concatenate the output from the second onto the first, don't overlay the first.

C:\Users\YourAccount>browstat status >browstat.txt
C:\Users\YourAccount>browstat listwfw pchucklan >>browstat.txt

Note the ">>" in the second command; that concatenates the output from the second command, after the output from the first command.

Finally, type

C:\Users\YourAccount>notepad browstat.txt

and Notepad will open with both browstat outputs, one following the other, in browstat.txt.

>> Top

NetCheck Source

Besides using network monitoring tools like The Dude, sometimes you need detailed information. Occasionally, having the same detailed information, for all computers on the network, is useful. If you need to extract that same bit of information, repeatedly, scripting the extract is the only thing to do.

This is where NetCheck comes into use.

NOTE: Using NetCheck successfully requires that you have a working administrative account setup, and in use, on your LAN. Make sure that you have the authority, before wasting your time.

Take the following code (everything INSIDE the "#####" lines). Please DO NOT include ANY portion of the "#####" lines. Follow instructions below, precisely.


  1. Create folder C:\Utility on your computer, and make that folder part of the Path.
  2. Download PSTools (free) From SysInternals. Copy all components of PSTools, unzipped, into C:\Utility.
  3. Open Notepad. Ensure that Format - Word Wrap is not checked. Highlight then Copy the code (Ctrl-C), precisely as it is presented below, and Paste (Ctrl-V) into Notepad.
  4. Add a list of your computers - substituted for "pc1 pc2 pc3" - into the third command. Note: This list is case insensitive - "PC1" is the same as "pc1".
  5. Save the Notepad file as "netcheck.cmd", as type "All Files", into C:\Utility.
  6. Run it by Start - Run - "netcheck".
  7. Wait patiently.
  8. When Notepad opens up displaying c:\netcheck.txt, first check Format and ensure that Word Wrap is NOT checked! Then, copy the entire contents (Ctrl-A Ctrl-C) and paste (Ctrl-V) into your next post. Or, examine the file yourself.


Do this from each computer, please, with all computers powered up and online. Running this code from each computer will give us a more complete picture of how each computer is setup, and what each computer can see from the others. On a completely working LAN, the multiple copies produced should be symmetrical. Running this, repeatedly, would be redundant. Since you're here, it probably won't be for you.

##### Start NetCheck Base Code

@echo off
@echo NetCheck V1.00 >c:\NetCheck.txt
for %%a in (pc1 pc2 pc3) do (call :Loop1 %%a)
notepad c:\netcheck.txt
goto :End

:Loop1
set NetCheckCmd=psexec \\%1
if /i %1!==%computername%! set NetCheckCmd=
@echo.
@echo NetCheck %1
@echo. >>c:\NetCheck.txt
@echo NetCheck %1 >>c:\NetCheck.txt
@echo. >>c:\NetCheck.txt
%NetCheckCmd% ipconfig /all >>c:\NetCheck.txt
@echo. >>c:\NetCheck.txt
%NetCheckCmd% net config server >>c:\NetCheck.txt
@echo. >>c:\NetCheck.txt
%NetCheckCmd% browstat status >>c:\NetCheck.txt

:End

##### End NetCheck Base Code

>> Top

Knowing What's On Your LAN

Whenever you are diagnosing a network problem, whether it involves simple Windows Networking connectivity, or file sharing, you can run native Windows commands like "net view". This tells you what servers can be seen on the LAN.

Unfortunately, "net view" is an application level diagnostic, and requires Server Message Blocks aka SMBs. Lack of SMBs, frequently caused by a misconfigured or overlooked personal firewall, is a common symptom. When you're diagnosing a network problem, you have to start at the lower levels, and work upwards. What about some diagnostics at a lower level, just to verify IP connectivity?

For an immediate scan of the subnet, I rely upon two free products - AngryZiber Angry IP Scanner, and Softperfect Research Network Scanner. Both tools will start with the subnet that your computer is attached to, and scan each possible IP address on that subnet. For each IP address responding, you can find out host name, MAC address, and response time. This is a good start, for finding, and tracking, computers on your network.

Remember, though, both of these products list hosts using Internet Protocol. If your LAN uses alternate transports like IPX/SPX or NetBEUI, neither will be very useful.

If you need to associate a MAC address with its vendor, the IEEE OUI / Company_id Assignments database can be searched for this information.

>> Top

The File And Settings Transfer Wizard

One of the many benefits of having a domain is the ease in managing user accounts and profiles. The user accounts, and profiles, start on the domain controller, and are replicated onto the client computers as necessary. The domain controller is updated, with any changes to the profile, from the client computer. When you move to a new computer, the updated profile is copied from the domain controller.

When you're in a workgroup, managing accounts and profiles is not so simple. Next time you have Windows Explorer open, look at "C:\Documents and Settings". Look at your personal profile folder structure in there. How do you find and copy all of the settings, and personal files, in there? Doing that, file by file, could take forever.

So we have the File and Settings Transfer Wizard, to export all personal settings, and profile files, for installation on another workgroup computer. To run the wizard, go to All Programs - Accessories - System Tools.

When you run the wizard, you have 2 main choices.

  • Export
    This is the computer I want to transfer files and settings from.
  • Import
    This is the computer I want to transfer files and settings to.


Should you choose to Export, you must then choose what media to use.
  • Direct (serial) cable.
  • Network.
  • Removable media ("Floppy" drive or similar).
  • Removable drive or network drive.


Should you choose to Import, you are asked about how you ran (or intend to run) the wizard on the old computer.
  • Create a wizard disk in removable media.
  • You already created a wizard disk.
  • You will use the XP CD wizard.
  • You already ran the wizard on the old computer, and have exported everything.


>> Top

Know Who's Accessing The Server

Most computers in a workgroup will run as a server, and some computers in a domain will too. Servers do not have unlimited capacity to serve you, and occasionally, they run out of available connections. You'll be trying to access another computer, and you'll see a message that you don't want to see

No more connections can be made to this remote computer at this time because there are already as many connections as the computer can accept.


And this can also be an issue, when you need to know, in general, what your computer is doing.

So what do you do now? Do you run around, turning off some computers, just so another computer can connect, or just to see if this computer will stop doing what you're wondering about? Sometimes, that's the only diagnostic left to us, but just maybe you can be a bit more methodical, this time.

You can start by identifying who's accessing the server right now. And you can use either one of two tools.

Computer Management
Computer Management is a tool in the Administrative Tools section of Control Panel.

Under Computer Management, you find System Tools, then Shared Folders.


Shares enumerates each share on the server, and the number of connections that are in use for each share. This is where you start, when the server has exceeded its connection limit.


Sessions enumerates the accounts being used for access, and the remote computers, by IP address.


Open Files enumerates the open files and folders, and what accounts are being used for access.


The command window based Net command, with 3 of its sub commands, will provide information similar to the Shared Folders wizard.

Net Shares enumerates the shares on the server.

C:\>net share

Share name Resource Remark

-------------------------------------------------------------------------------
E$ E:\ Default share
IPC$ Remote IPC
D$ D:\ Default share
ADMIN$ C:\WINDOWS Remote Admin
C$ C:\ Default share
CDrive C:\
DDrive D:\
EDrive E:\
Quarantine E:\Quarantine
System Resources
E:\System Resources
Utility C:\Utility
The command completed successfully.


Net Sessions enumerates the remote computers (by IP address) and the accounts being used for access.

C:\>net sessions

Computer User name Client Type Opens Idle time

-------------------------------------------------------------------------------
\\192.168.203.100 CCROLL_ADMIN Windows 2000 2195 1 00:42:48
The command completed successfully.


Net Files enumerates the shared files or folders being accessed, and the accounts being used for access.

C:\>net file

ID Path User name # Locks

-------------------------------------------------------------------------------
3 E:\Temp\20060925 CCROLL_ADMIN 0
The command completed successfully.


>> Top

Diagnosing Network Problems Using PingPlotter

Many network problems, given enough test cases, can be diagnosd by simple observation and comparison. If you can access Computer C from Computers A and B, but you can't from Computer D, better look at Computer D. If Computer A can access Websites 1 and 2, but can't access Website 3, what's different about Website 3?

What if the problem comes and goes - now you can access with no problem, and now you can't? Maybe Computer A doesn't work now, but it's working later when Computer B stops working? Or if Website 1 is accessible, but Website 2 isn't, how do you identify the problem? How do you even track the problem, without having assistants to help you watch all of the computer involved?

I start with PingPlotter. PingPlotter combines a traceroute (traditionally a single timed ping of all addressed hosts between one computer and another) with repetitious pinging, and an interactive GUI display. PingPlotter lets you look for geographical problems (showing that you have connectivity between your computer and the first router, but not the second), or for repetitous problems (showing when you lose connectivity, whether chronic, cyclical, or randomly).

Let's say that you are losing connection with the Internet, on all computers on your LAN, periodically. By running PingPlotter on your computers, you can note whether the problem is with your router (if all computers show loss of connectivity with that router), with your ISP (if all computers show loss of connectivity with your ISPs gateway, but no problem with your router), or with a given server on the Internet. If the problem is intermittent, the PingPlotter display will show when the problem happens - and if its a chronic problem which includes loss of connectivity with your ISP, having a PingPlotter display may be worth a thousand words.

Since PingPlotter shows ping times for every host between you and your target, when there is a break in connectivity somewhere, it will show the break. You will see a red ping display for any hosts that do not respond at all, and the host that is causing the problem will probably be the closest one showing as red.

A PingPlotter display is interactive too. If there are a dozen hosts between you and a given website, maybe you only want to examine connectivity details with 4 hosts - yours, your ISPs gateway, your ISPs border, and the target server. You can selectively configure PingPlotter to show only those hosts, saving valuable screen space for other tasks. At any time, you can add any of the other hosts to the display, and the past history for those hosts will be visible too.

You can also vary the time scope of the display. You can look at an entire 48 hours in a 6 inch horizontal display, or zoom in on any 5 minutes, and look at those 5 minutes in detail. Or you can select any of 8 other scales in the display.

The paid version of PingPlotter can even be set to trigger alerts when certain definable network conditions occur, and to contact you by text messaging, or by email. So you need not be at your desk, watching the display, to be notified of a chronic problem.

All in all, PingPlotter is one network diagnostic that has a place in my toolbox. The paid version, PingPlotter Pro, is well worth the expense.

>> Top

The Network Adapter Settings Wizard

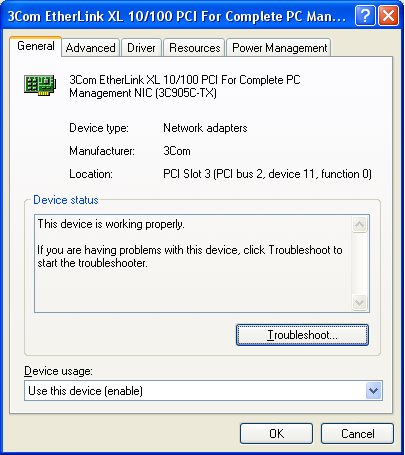
The drivers for every network adapter produced allow various settings to be changed, to suit your idea of how you would like your network to perform. Modern network adapters let you change your settings thru a wizard, generally accessed thru the (Local Area) Connection Properties Wizard.

From the Connection Properties Wizard, hit Configure.

This gives you a whole array of selections, which will vary according to to vendor, and how the configuration driver, for your network adapter, is constructed.

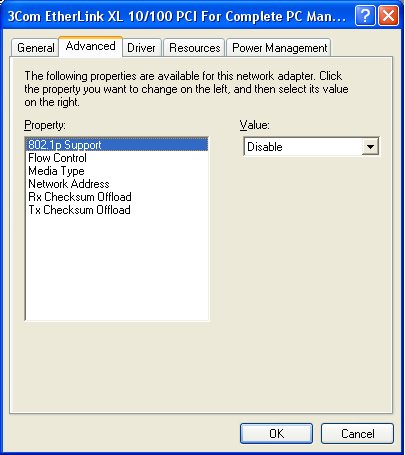
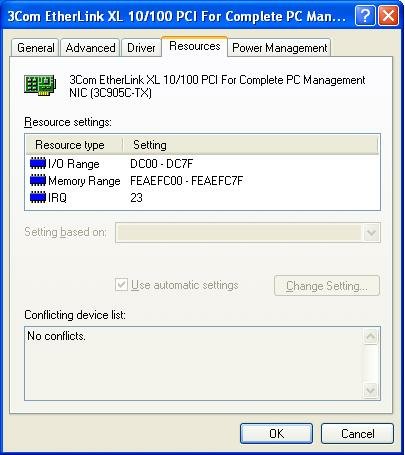
My adapter here is a 3Com Etherlink XL 10/100. Your adapter, and the settings, may differ.


On the advanced tab, you will find most of the settings which will help you.


  • Media Type
    • 10M Full duplex
    • 10M Half duplex
    • 100M Full duplex
    • 100M Half duplex
    Most networks will work fine with Auto Select enabled. If your network is slow, it may be because of errors, caused by either network adapter, or by the the cable / WiFi channel connecting the two. Changing it to 10M Half duplex may eliminate speed related errors, and stabilise things. Or, it may run better with 100M Full duplex explicitly enabled.
  • Network Address. Here you can change the MAC address.
  • If you change any of these settings, be prepared to restart the computer.


Consider carefully if the possible inconvenience is worth the minor power savings. Power consumption, by the typical desktop Ethernet NIC, is neglible. With a WiFi adapter on a portable computer, if the computer is running on battery power, this may not be the case. Consider both cases carefully.


>> Top

Process Explorer

Microsoft Windows gives us the ability to run multiple processes simultaneously - it's called multitasking. Some processes we start intentionally - we call them applications or programs. Other processes are started by the system - we call them services. Keeping track of all of the processes running, at any time, is a major activity.

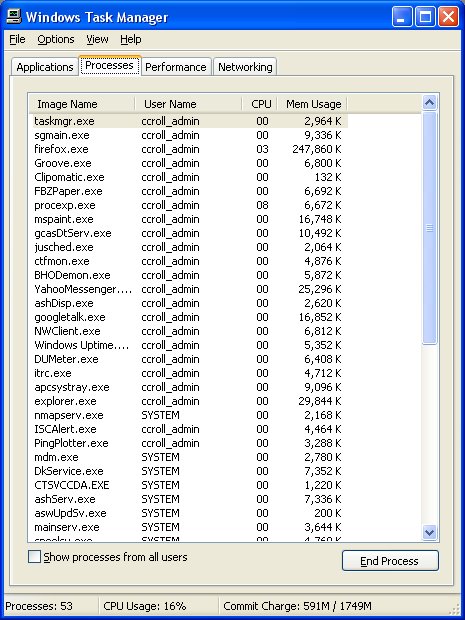
Microsoft gives us Task Manager, to track the processes. Task Manager lets us choose a total of 25 items that we can learn about each process. This is the original tool that you might use, in watching what your computer is doing.

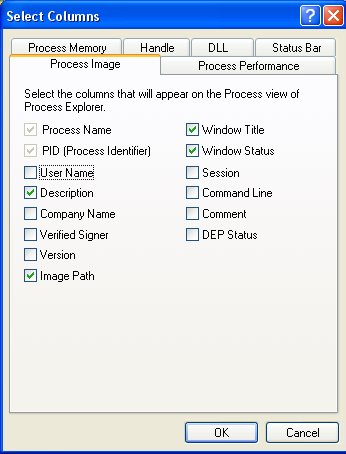
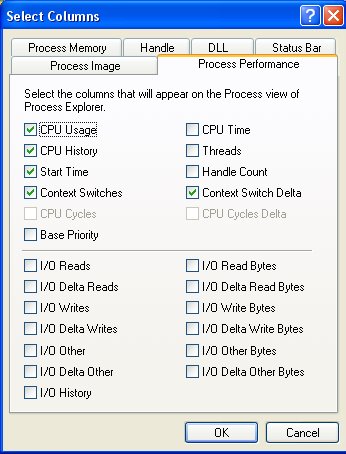
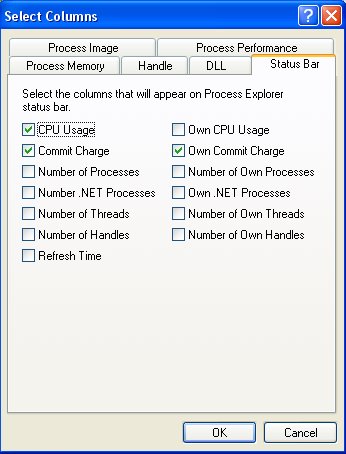
SysInternals (now another division of Microsoft, but that's another story) gives us Process Explorer, which lets us choose, in a tabbed menu

  • DLL - 15 items.
  • Handle - 6 items.
  • Process Image - 14 items.
  • Process Memory - 14 items.
  • Process Performance - 24 items.
  • Status Bar - 13 items.

There are 3 Process (Image, Memory, and Performance) tabs. The complement of 52 items selectable there is comparable to the complement of 25 items selectable for Task Manager.

Task Manager


This is how I use Task Manager.


You can choose any of 25 items here for display.


Process Explorer


This is how I use Process Explorer.


You can choose from 14 items in Process Image.


You can choose from 14 items in Process Memory.


You can choose from 24 items in Process Performance.


You can choose from 13 items in Status Bar.


You can choose from 15 items in DLL.


You can choose from 6 items in Handle.


>> Top

Finding, and Tracking, Computers On Your Network

Many people (and most of those who read these articles) have more than one computer. After a while, some of us even forget what computers we have. I know I do - my memory escapes me sometimes. So what can we do?

The most obvious answer is to make a list. But what if you forget to update the list?

So the next answer is to let your computer track your computers. If you can find one computer (and if you can't, your problem exceeds the scope of PChuck's Network for help), you can run one of these free utilities, and find the others.


Angry IP Scanner, and SoftPerfect Network Scanner, provide quick, one time IP scans of the local network, and give you a neat tabulation of all addressable devices, that respond to pings, on that network.

The Dude, on the other hand, will do an auto discovery scan of any subnet of interest, using multiple protocols - IMAP4, IP, and SNMP. And it will monitor connectivity, on an ongoing basis, of all discovered (or manually defined) devices, using those protocols and more - DNS, HTTP, IMAP4, IP, and NetBIOS. If you're tired of checking your server every couple of hours, to see if it's up, use The Dude, with its customisable polling intervals, to watch your server for you, and notify you when it doesn't respond to polling on any relevant protocol.

Maybe a couple of years ago, you would use tools like these at work, and pay well for them. These tools are free, and your home network can probably benefit from their use.

All three of these tools have a permanent place in my toolbox.

>> Top

Identifying The Cause Of STOP Errors Using Pstat & Excel

Microsoft Windows NT in general, and Windows 2000, XP , and now Vista in particular, are increasingly more "user friendly". Continually, Microsoft adds wizards to help us do things, or to help us figure out why something didn't work the way that it should have. But all the wizards imaginable can not cover every possible problem; and occasionally our computer will encounter a problem that leaves no recourse other than for it to simply shut down.

This shut down condition is commonly referred to as a STOP error, or a Black (Blue) Screen of Death, aka BSOD.

Many times, looking at the contents of the STOP error message will show the address where the error occurred. First look up the detailed information about the specific STOP code in order to determine if the address is included, and if, so where in the error message might the address be found.

You can identify the meaning of each of the parameters for your specific STOP code, using the Microsoft Developer Network: Bug Check Codes as a reference. For an example, we might look at the 0xA: IRQL_NOT_LESS_OR_EQUAL STOP, which tells us that the address of the offending module can be found in the fourth parameter. Note this address, for later reference.

Having noted the address of the offending module, now list the addresses at which each active process is being loaded. The Pstat utility will provide this information. On some systems the Pstat utility may already be present. Check this by opening a Command Prompt window, and entering the following command:

C:\>pstat /?


If Pstat is not on your computer, you can download it free from Microsoft, as part of the
Microsoft Windows XP Service Pack 2 Support Tools.

With Pstat installed on your computer, next open a Command Prompt window, and generate a report. Because you need only a part of the information from this report, it is best to create the report as a text file. In the Command Prompt window enter the following command:
C:\>pstat > C:\temp\pstat.txt


You may change c:\temp to whatever drive and folder that you want to save the report into.

Now open the saved file in Notepad.
C:\>notepad c:\temp\pstat.txt


Scroll down the file, about 80% of the way to the end of the file and you will find a header line:

ModuleName Load Addr Code Data Paged LinkDate


Delete everything above the header line. Save this file under a different name. I use pstat2.txt, and put it into the same c:\temp folder.

Now launch Microsoft Excel, and do File - Open, to bring the pstat2.txt file into Excel. Excel will parse the file into columns. Once this is done, do Data - Sort, and sort the entire spreadsheet based on the value in Column B (Load Addr).

Now, simply read Column B, until you find the highest value that is less than the address noted above. That module name, in column A, is the prime suspect for the cause of your error.

Instructions courtesy of Ron Martell, MVP.

>> Top

Analyse Your WiFi Environment Objectively

When you setup a network of computers, in your home or small office, a mass of Ethernet cables running everywhere can be a problem. WiFi, or Wireless networking, can provide relief from the mass of cables. But WiFi is not an effortless replacement for Ethernet. Installing a WiFi network takes careful preparation.

There are many reasons why you won't get the expected bandwidth from any WiFi network. Some of them you can correct, others you can't. And sometimes, even without you making any changes, you'll have problems. All the planning you do is useless when your neighbours install a WiFi LAN next door.

With all of that in mind, you need to evaluate your WiFi environment objectively, both before setting up a WiFi LAN, and after. When "it stops working", find out why. When your Ethernet network stops working, you can start with a simple IP scan of the subnet. With a WiFi network, you have to go a level deeper than Internet Protocol (sometimes, IP may not even be relevant).

There are many tools to objectively analyse your WiFi network; some are free, others cost good money. Here are but two.

Netstumbler makes a free, lightweight WiFi spectrum analyser from your computer and WiFi adapter of your choice. Netstumbler continuously scans the WiFi spectrum covered by your WiFi adapter, identifying each WiFi network device (whether access point / router, or client), and recording a dozen or so metrics about each network device found.

NetStumbler has two displays, both very useful. The display that you see immediately is the AP inventory, which enumerates each AP observed, and includes over a dozen very useful details about each. But you can discover more.

If you identify an interesting AP from the main list, you can find the MAC address for that AP. From a tree entry in the left column, you select a specific MAC address, and you can observe a running signal to noise graph for that network device.

Netstumbler, though free, and easy to use, has disadvantages.

  • It does not work with every known WiFi adapter.
  • It does not analyse non WiFi signals. If you have a cordless phone, microwave oven, or nearby ham radio operator, NetStumbler will show those merely as "noise", as part of the signal to noise ratio for any WiFi network device.
  • NetStumbler binds to the WiFi adapter just like any other WiFi client. If you run NetStumbler while you're attached normally to your network, using WiFi, you'll experience the same instabilities as when when you run multiple WiFi client managers.
  • It's not compatible with Windows Vista.


The Wi-Spy Spectrum Analyzer overcomes some of the disadvantages of Netstumbler. The Wi-Spy is a USB dongle / WiFi receiver, that will receive and analyse signals in the WiFi spectrum.
  • It does not require an add-on WiFi adapter, and has no compatibility problems like NetStumbler.
  • It provides the same sort of analyses about all detectable WiFi network devices, as NetStumbler. Also, it analyses the noise (signals from non-WiFi devices) in the spectrum, and attempts to identify the device producing the noise, from a database of known interference sources.
  • It works with Linux, Mac, and Windows (Windows 2000 or XP, and yes, Vista).
  • It is not inexpensive, but it is worth the price.


Note that NetStumbler has its shortcomings, in lack of support for new technology. Fortunately, alternative products are available.

>> Top

Watching What Your Computer Is Doing

Your computer, as it runs the many programs that you (or others) start on it, and access other computers on your local or wide area network, is very busy. Even when you aren't doing anything intentionally, your computer is still busy. Sometimes, knowing what your computer is actually doing, at any time, is a critical need.

Long years ago, a computer would be pictured in a movie as a big metal box, with lots of flashing lights. Those lights were used, at that time, to tell what the computer was doing. Those computers ran very slowly (sometimes, not at all), and the flashing lights were critical to knowing what was going on, at any time.

The equivalent of a Blue Screen Of Death was known as (among other terms, some of which won't ever be discussed here) a Hard Stop. When a Hard Stop occurred (which could be many times / day, depending upon what programs were running), the lights would be used to describe what the computer had been doing, and to display the contents of memory and registers.

Today, no computer could ever drive enough lights to tell you anything useful. You typically have three lights on your computer. These lights tell you that the computer is doing something, Period.

  1. Disk activity.
  2. Network activity.
  3. Power.

If you want to have any idea what your computer is doing, you'll have to at least list the tasks it's running. Task Manager is provided as a native component in Windows. Process Explorer (free) from the SysInternals division of Microsoft, provides more detail than Task Manager.

Knowing what tasks are running is a good place to start, but it's only a start. How do you know what each task is doing? I use Filemon and Regmon (both free, and both again from SysInternals).
  • Filemon lists files, as accessed (read and / or written) by any given process.
  • Regmon lists registry values, as accessed (read and / or written) by any given process.

You can use both programs simultaneously, or either program separately, at your convenience.
  1. Open the application that interests you.
  2. Identify the application in Process Explorer, and get its PID. Maybe use the Process Finder to automatically locate the entry for any visible window.
  3. Start Filemon / Regmon.
  4. Create a filter in either application, ":PID" where PID is the PID of the application in question.
  5. Go back to your application, make the change, and watch what Filemon / Regmon displays.
  6. When you find an interesting entry in Filemon, you can double click on it, to open Windows Explorer, and display the folder containing it.
  7. When you find an interesting entry in Regmon, you can double click on it, to automatically open Regedit, and display the registry entry in question.
  8. The filter used by Filemon and Regmon is very simple, and easy to use - it's a simple text string. If you know a process name, or file or registry path, you can filter on whatever you know. Use your imagination.
  9. Both Filemon and Regmon use a context menu (right mouse click) for displayed entries, and a toolbar with several other possibilities. Both can display changes continually (automatically scrolling as you watch), or will let you freeze the display, and manually scroll, at your convenience.

Besides knowing what your computer is doing right now, it is useful sometimes to know what your computer did when it started up. A lot of processes - legitimate, not legitimate, and some in between the two, are started, by other processes, when the computer starts up. Knowing how any process starts up can be important to knowing what it's doing right now. Autoruns (another SysInternals product) and HijackThis are key tools (both free) that I use for this purpose.

Now all of the above tools are used to monitor your computer, and what it's doing on its own. Most computers are used on a network, and make connections to other computers. TCPView, another SysInternals product, shows you what other computers your computer is connected to, local and distant.

If your computer uses WiFi for connectivity, knowing who shares the WiFi spectrum with you could be relevant.

And remember that most computers running Windows contain some server functionality. If your computer is on a local network with other Windows computers, sometimes knowing who else is accessing it is useful too.

>> Top

Network Diagnostics Using Net Config

When you're having a problem accessing network resources, or displaying what network resources are available, Browstat is a good starting point. To check IP connectivity setting, you use IPConfig. Sometimes, though, neither "browstat status" nor "ipconfig /all" tells you what you need to know.

Starting from the lower level of the OSI Network Model, you look at an "ipconfig /all" log, and see a network connection, identified as:


Physical Address. . . . . . . . . : 00-04-76-D7-C5-6A

IP Address. . . . . . . . . . . . : 192.168.1.50


You suspect, but you can't tell for sure, that that same connection is identified in the accompanying "browstat status" log, as:

Status for domain WORKGROUP on transport NetBT_Tcpip_{B7E18D15-D9B1-4295-9DAD-C733C695294F}


To correlate the information provided by "browstat status" and "ipconfig /all", or in cases where IPConfig is irrelevant (such as where IPX/SPX must be used), you can use the "net config" commands:

net config server
net config workstation

As with any other command, you run it from a Command Window (or a command window in Windows Vista), which gives you the ability to redirect the output, to a text file, for analysis later. Since you're running 2 commands, one after the other, be sure to concatenate the output from the second after the first. Only type the command itself into a command window - do not type Start - Run - "net config...".

Let's look at "net config" from my mythical computer, "PChuck1".

First, "net config server".

Server Name \\PChuck1
Server Comment Primary

Software version Windows 2002
Server is active on
NetbiosSmb (000000000000)
NetBT_Tcpip_{B7E18D15-D9B1-4295-9DAD-C733C695294F} (000476D7C56A)


Server hidden No
Maximum Logged On Users 10
Maximum open files per session 16384

Idle session time (min) 15
The command completed successfully.


Next, "net config workstation".

Computer name \\PChuck1
Full Computer name PChuck1.martinez.cacroll.net
User name pchuck

Workstation active on
NetbiosSmb (000000000000)
NetBT_Tcpip_{B7E18D15-D9B1-4295-9DAD-C733C695294F} (000476D7C56A)

Software version Windows 2002

Workstation domain PChuck
Workstation Domain DNS Name pchuck.local
Logon domain PChuck

COM Open Timeout (sec) 0
COM Send Count (byte) 16
COM Send Timeout (msec) 250
The command completed successfully.

What does all of this tell us?

  • First,
    Computer name \\PChuck1

    PChuck1 is the name of the computer, which matches the browstat and ipconfig logs.
  • Next,

    Server is active on
    NetbiosSmb (000000000000)
    NetBT_Tcpip_{B7E18D15-D9B1-4295-9DAD-C733C695294F} (000476D7C56A)

    Shows us two key items:

    • The network connection is using NetBT and SMB. This is a normal binding list.

      • If there was only an entry for "NetbiosSmb", file sharing would work, but access by name will be a problem. Always Enable NetBT for best results.
      • If there was an entry for "NwlnkIpx" and / or "NwlnkNb", file sharing MAY work, but irregularly.

    • The entry
      NetBT_Tcpip_{B7E18D15-D9B1-4295-9DAD-C733C695294F}

      as shown in "browstat status", corresponds to MAC address
      000476D7C56A

      as shown in "ipconfig /all".

  • A small, but still important detail,

    Server hidden No

    tells us that the server is intended to be visible in Network Neighborhood.
  • And some more details,

    Maximum Logged On Users 10
    Maximum open files per session 16384

    Idle session time (min) 15

    may tell us why all of the computers in the workgroup can't access shares on the server simultaneously.
  • Finally,

    Workstation domain PChuck
    Logon domain PChuck

    Shows that this computer is a member of domain (or workgroup) PChuck, and is logged on to domain PChuck. If your domains and workstations are named with some thought, this likely indicates that the computer in question is logged in to domain PChuck. On the other hand, if we had

    Workstation domain PChuck
    Logon domain PChuck1

    then we know that this computer is a member of domain (or workgroup) PChuck; but, in this case, the computer is logged on locally, to PChuck1. Note that since you can generally logon locally to any computer, even if it's a domain member, we still cannot tell if it's a domain or workgroup member.

A Gratuitous Protocol
But look closely at the list of protocol bindings. If "net config server" shows us, for instance,

Server is active on
NwlnkIpx (000000000001)
NwlnkNb (0016f004143e)
NetBT_Tcpip_{747CE691-1460-4F27-AB2F-F19C2110CCFB} (0016f004143e)
NetbiosSmb (000000000000)

Here we see another example of the presence of IPX/SPX ("NwlnkIpx"), and of NetBEUI ("NwlnkNb"). If you're having problems, which I presume is why you're here, always start by removing IPX/SPX and / or NetBEUI.

CPSServ ("Comprehensive PSService") Source

Any computer running Windows Networking has certain network components and services, and requires those services to be running (generally Started and Automatic) for proper functionality. CPSServ checks your network, for the presence of those services, and their visibility from each computer on the network. When you are researching a network problem, having redundant information is useful.

Proper interpretation of the output from CPSServ requires identification of the version and edition of Windows, running on each computer. CPSServ will run on any Windows NT (NT, 2000, XP, Vista) computer, though it will provide essential diagnostic data, through the network, from computers running Professional operating system editions (Windows XP Pro / Windows Vista Business or Ultimate), with administrative access available (Simple File Sharing disabled / Password Protected Sharing enabled, and not restricted by Guest-only access).

Windows XP Home and Vista Home Basic don't run the Remote Registry Service, so they won't appear through the network. With a LAN of all Professional edition computers with administrative access, you could possibly obtain a complete diagnostic from running CPSServ on just one computer (though it is more valuable when run on more than one); with a LAN of Home edition computers, you will need CPSServ run on each computer.

Take the following code (look below, and copy everything BETWEEN the two lines, that contain "#####"). Please DO NOT include ANY portion of the two lines that contain "#####". Follow instructions below, precisely.


  1. Create folder C:\Utility on your computer, and make that folder part of the Path.
  2. Download PSTools (free) From SysInternals. Copy all components of PSTools, unzipped, into C:\Utility.
  3. Identify the Code below.
    • Look below, and find the first line "##### Start CPSServ Base Code".
    • Look below, and find the second line "##### End CPSServ Base Code".
    • The Code is everything BETWEEN those two lines.

  4. Open Notepad. Ensure that Format - Word Wrap is not checked. Highlight then Copy the code (Ctrl-C), precisely as it is presented below, and Paste (Ctrl-V) into Notepad.
  5. Save the Notepad file as "cpsserv.cmd", as type "All Files", into C:\Utility.
  6. Run it by Start - Run - "cpsserv".
  7. Wait patiently.
  8. When Notepad opens up displaying c:\cpsserv.txt, first check Format and ensure that Word Wrap is NOT checked! Then, copy the entire contents (Ctrl-A Ctrl-C) and paste (Ctrl-V) into your next post.


Do this from each computer, please, with all computers powered up and online. Running this code from each computer will give us a more complete picture of how each computer is setup, and what each computer can see from the others. On a completely working LAN, the multiple copies produced should be symmetrical. Running this, repeatedly, would be redundant. Since you're here, it probably won't be for you.

##### Start CPSServ Base Code

@echo off
set Version=V1.10
@echo CPSServ Comprehensive Networking Services %Version% - %computername%
@echo Start CPSServ %Version% - %computername% >c:\cpsserv.txt
@echo. >>c:\cpsserv.txt
@echo Find Computer Browser ("browser").
@echo Find Computer Browser ("browser") >>c:\cpsserv.txt
psservice find browser >>c:\cpsserv.txt
@echo. >>c:\cpsserv.txt
@echo Find DHCP Client ("dhcp").
@echo Find DHCP Client ("dhcp") >>c:\cpsserv.txt
psservice find dhcp >>c:\cpsserv.txt
@echo. >>c:\cpsserv.txt
@echo Find TCP/IP NetBIOS Helper ("lmhosts").
@echo Find TCP/IP NetBIOS Helper ("lmhosts") >>c:\cpsserv.txt
psservice find lmhosts >>c:\cpsserv.txt
@echo. >>c:\cpsserv.txt
@echo Find Remote Registry ("remoteregistry").
@echo Find Remote Registry ("remoteregistry") >>c:\cpsserv.txt
psservice find remoteregistry >>c:\cpsserv.txt
@echo. >>c:\cpsserv.txt
@echo Find Server ("server").
@echo Find Server ("server") >>c:\cpsserv.txt
psservice find server >>c:\cpsserv.txt
@echo. >>c:\cpsserv.txt
@echo Find WF / ICS ("sharedaccess").
@echo Find WF / ICS ("sharedaccess") >>c:\cpsserv.txt
psservice find sharedaccess >>c:\cpsserv.txt
@echo. >>c:\cpsserv.txt
@echo Find Workstation ("workstation").
@echo Find Workstation ("workstation") >>c:\cpsserv.txt
psservice find workstation >>c:\cpsserv.txt
@echo End CPSServ %Version% - %computername% >>c:\cpsserv.txt
notepad c:\cpsserv.txt

##### End CPSServ Base Code

LSP / Winsock Analysis Using "netsh"

The LSP / Winsock component in the Internet Protocol network stack is complex. It's used by the Windows OS, and by malware and anti-malware alike, to allow, and to affect, your access to the network.

Problems with the LSP / Winsock layer can be a lot of fun to diagnose. Generally, the problem is termed "corruption", and you are urged to use any of several tools / procedures to simply reset it. But what if you suspect a problem, but a simple reset isn't possible? Or what if you want to make an educated decision about a problem, or to help somebody else do the same?

Hoping that the operating system on your computer is Windows XP with Service Pack 2 (which is where you should be for so many reasons), Microsoft has provided a native Windows command, "netsh". This command is one of the procedures used to reset Winsock.

A variation on the netsh Winsock reset provides an inventory of Winsock. In this case, please DO NOT type, into a command window:


netsh winsock reset catalog

but instead type:

netsh winsock show catalog

To create text to be posted online:

netsh winsock show catalog >c:\winsock.txt
notepad c:\winsock.txt

Diagnosing Network Problems Using PingPlotter

Many network problems, given enough test cases, can be diagnosd by simple observation and comparison. If you can access Computer C from Computers A and B, but you can't from Computer D, better look at Computer D. If Computer A can access Websites 1 and 2, but can't access Website 3, what's different about Website 3?

What if the problem comes and goes - now you can access with no problem, and now you can't? Maybe Computer A doesn't work now, but it's working later when Computer B stops working? Or if Website 1 is accessible, but Website 2 isn't, how do you identify the problem?

I start with PingPlotter. PingPlotter combines a traceroute (traditionally a single timed ping of all addressed hosts between one computer and another) with repetitious pinging, and an interactive GUI display. PingPlotter lets you look for geographical problems (showing that you have connectivity between your computer and the first router, but not the second), or for repetitous problems (showing when you lose connectivity, whether chronic, cyclical, or randomly).

Let's say that you are losing connection with the Internet, on all computers on your LAN, periodically. By running PingPlotter on your computers, you can note whether the problem is with your router (if all computers show loss of connectivity with that router), with your ISP (if all computers show loss of connectivity with your ISPs gateway, but no problem with your router), or with a given server on the Internet. If the problem is intermittent, the PingPlotter display will show when the problem happens - and if its a chronic problem which includes loss of connectivity with your ISP, having a PingPlotter display may be worth a thousand words.

Since PingPlotter shows ping times for every host between you and your target, when there is a break in connectivity somewhere, it will show the break. You will see a red ping display for any hosts that do not respond at all, and the host that is causing the problem should be the first one showing as red.

A PingPlotter display is interactive too. If there are a dozen hosts between you and a given website, maybe you only want to examine connectivity details with 4 hosts - yours, your ISPs gateway, your ISPs border, and the target server. You can selectively configure PingPlotter to show only those hosts, saving valuable screen space for other tasks. At any time, you can add any of the other hosts to the display, and the past history for those hosts will be visible too.

You can also vary the time scope of the display. You can look at an entire 48 hours in a 6 inch horizontal display, or zoom in on any 5 minutes, and look at those 5 minutes in detail. Or you can select any of 8 other scales in the display.

The paid version of PingPlotter can even be set to trigger alerts when certain definable network conditions occur, and to contact you by text messaging, or by email. So you need not be at your desk, watching the display, to be notified of a chronic problem.

All in all, PingPlotter is one network diagnostic that has a place in my toolbox. The paid version, PingPlotter Pro, is well worth the expense.

Windows XP System Restore

With Windows XP, Microsoft included a feature that keeps a copy of key system settings. In case you make a mistake configuring a system setting, or some basic application setting, you may be able to, conveniently, recover the system to a previous state before the mistake.

Windows XP automatically makes periodic copies, which it calls System Checkpoints. You can manually make copies too. Windows XP includes the System Restore wizard, which you can run from All Programs - Accessories - System Tools - System Restore.

When presented the System Restore wizard initial menu, you have 2 choices.


  • Restore system settings ("Restore my computer...").
  • Create a restore point.

Recover To A Restore Point
If you need to recover system settings to a previous time, and System Restore was enabled some time previous, you will be presented a calendar which will identify System Restore points previously created. Upon your selection of a restore point, the system will recover itself to that point. You should plan to restart the computer, so closing all open applications first would be a good idea.

  • Close all open applications.
  • Start the System Restore wizard.
  • Select "Restore my computer...".
  • Select a restore point, from the calendar, then from the restore point inventory.
  • Hit Next, and follow instructions.


Remember that when you restore to a given past point, all affected changes made after that point will have to be repeated. And remember that System Restore has a limited scope:

  • You should not plan to go back too far. The farther back you go, the more desired system changes will be wiped out, and will have to be repeated.
  • Don't plan on too many application changes being covered by System Restore.
  • Don't plan on ANY data files - Windows or third party - being covered.

Create A Restore Point
If you plan to make some system configuration changes, or reload key system files, it's a good idea to create a System Restore point. Just don't go overboard - note the limitations described above.

  • Start the System Restore wizard.
  • Select "Create a restore point".
  • Give a name to your restore point (remembering to make the name unique and descriptive) (note that the name you pick can't be changed).
  • Hit Next, and follow instructions.


Note The Limitations
System Restore is NOT a backup and recovery tool. Don't count on System Restore for system backups in general. For more information about System Restore, see (KB306084): How to restore the operating system to a previous state in Windows XP.

Enable System Restore First
To be used, System Restore has to be enabled. It may have been enabled by system setup, but it's not a bad idea to make sure it's active. In the System Properties wizard, select the System Restore tab. You enable System Restore for each partition that you wish it to be active on.

Since I, personally, separate my hard drive into 3 partitions (System, Applications, and Data), I enable System Restore on two partitions: C: (System) and D: (Applications). I don't need the overhead, which would not be productive, on my Data partition, so I leave my E: drive not monitored. This decision is entirely up to you.

Also up to you is the Disk Space usage. For each partition monitored, select that partition, and hit Settings. This will give you a control that will let you adjust how much space you wish to be used, by multiple System Restore checkpoints.